
Kombucha Recipe 1 Gallon "Short-Cut" Method
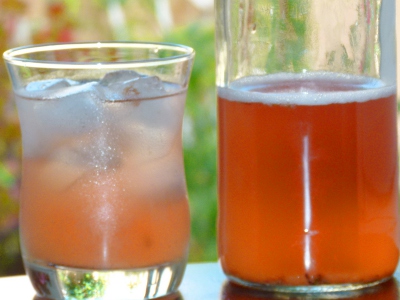 This easy Kombucha Recipe was designed for anyone who wants to brew up to a gallon in their first batch. The steps are specifically arranged to create a simpler process for you.
Following this basic Kombucha Recipe also prevents contamination by eliminating the wait for the sweet tea to cool. Because you can add the fresh Kombucha SCOBY and starter liquid right away, the brew is guaranteed to succeed.
Quick Tip: Scale This Kombucha Recipe Depending On The Size Of Your Vessel

Easy Kombucha Recipe
Kombucha has been made for thousands of years by people all over the world because it is easy to prepare and offers immediate and long term benefits to the regular drinker. The ingredients are inexpensive and the process is simple and sustainable. However, care should be taken anytime food is prepared at home. Follow these directions to brewing success!
We call this a “short-cut” recipe because rather than boiling ALL the water and then waiting for it to cool down, we streamline the process by only steeping the tea in a portion of the boiling water, then add cool water so we can add our SCOBY quickly to prevent mold from developing in the sweet tea.
– Yield: 3/4 Gallon
– Calories per 8oz Serving: about 30
– Prep Time: 5 minutes
– Cook Time: 20 minutes
– Total Time: 25 minutes
Ingredients
- 3/4 gallon (3 liters) purified or bottled chlorine-free water
- 4-6 tea bags or 4-6 teaspoons loose leaf tea like Hannah’s Special Tea Blend for Perfect Kombucha
- 1 cup (200g) organic sugar
- Kombucha Mother Culture – SCOBY
- 1-2 cups (250-500ml) strong starter liquid, aka well-fermented Kombucha (included FREE with every KKamp SCOBY)
- fruit, juice, flowers, or other flavorings (optional)
Equipment
- pot or tea kettle
- brewing vessel at least 1 gallon in size
- stirring spoon
- tight weave cloth cover (no cheesecloth) and rubber band or custom brewer cap
- bottles with tightly closing lids
Shop Quality Supplies from Kombucha Kamp
-

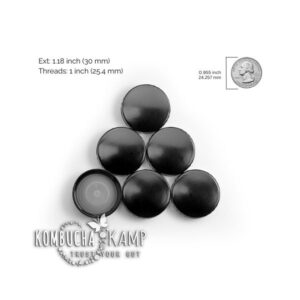
Replacement Bottle Caps (25mm)
$5.95 – $9.95Price range: $5.95 through $9.95 Select options This product has multiple variants. The options may be chosen on the product page -
Sale!
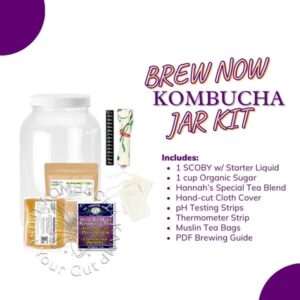
Kombucha Brew Now Jar Kit
Rated 5.00 out of 5$95.00Original price was: $95.00.$82.88Current price is: $82.88. Add to cart -
Sale!

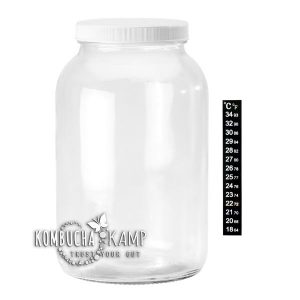
1 Gallon Glass Jar With Lid (Made in USA)
Rated 5.00 out of 5$19.95 – $34.95Price range: $19.95 through $34.95 Select options This product has multiple variants. The options may be chosen on the product page -
Sale!

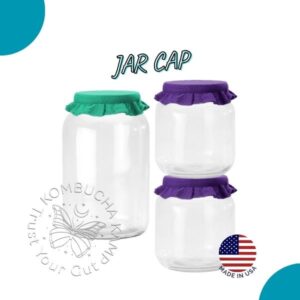
Brewer Cap for Fermentation Jars Made of Cloth, Fits 4″ – 5″ Diameter Jar Mouth
Rated 5.00 out of 5$16.95Original price was: $16.95.$9.95Current price is: $9.95. Select options This product has multiple variants. The options may be chosen on the product page -

Hand-Cut Cloth Cover & Rubber Band – For Brewing Jar and Vessels
Rated 4.96 out of 5$2.95 Add to cart -
Organic Evaporated Cane Juice Sugar Crystals Online
Rated 5.00 out of 5$7.95 – $28.95Price range: $7.95 through $28.95 — or subscribe to save up to 5% Select options This product has multiple variants. The options may be chosen on the product page -
Sale!
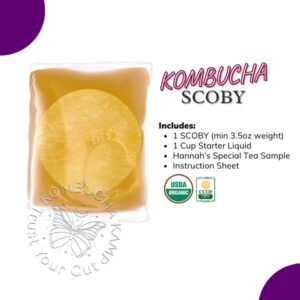
Kombucha SCOBY Culture
Rated 4.99 out of 5$38.88Original price was: $38.88.$28.88Current price is: $28.88. Add to cart -
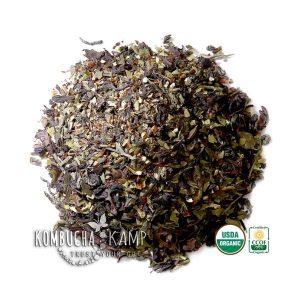
Organic Hannah’s Special Tea Blend
Rated 4.99 out of 5$16.95 – $99.95Price range: $16.95 through $99.95 — or subscribe to save up to 5% Select options This product has multiple variants. The options may be chosen on the product page
The Lucky 13 Step Kombucha "Short-Cut" Recipe
- Boil 4 cups (1 liter) of purified water.
- Add hot water & loose leaf tea or tea bags to pot or brewing vessel.
- Steep 7-15 minutes, then remove tea bags and dispose of loose leaf tea.
- Add sugar and stir to dissolve. Stir in hopes, dreams, wishes and affirmations!
- – If the vessel is empty, add 2-3 quarts (2-3 liters) of purified water, then add the hot tea solution. (adding cold water first helps keep the vessel from heating up)
or
– If the sweet tea was made in the vessel, then simply add 2-3 quarts (2-3 liters) of purified water
NOTE: The amount of water added depends on vessel size. If exactly one gallon or a little smaller then leave enough space for the culture, starter liquid & 1-2 inches from the top for breathing room. If your vessel is larger than one gallon, add no more than 3 quarts (3 liters) of cold water to the 1 quart (1 liter) of hot sweet tea. - Check to make sure the sweet tea is body temperature or below. A clean finger is the perfect testing tool!
- Once it is, add SCOBY and starter liquid.
- Cover with cloth cover and rubber band or a custom brewer cap.
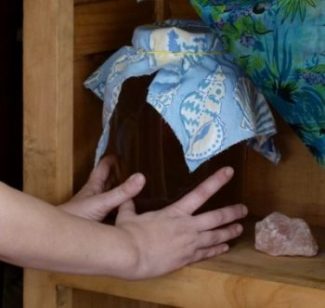 Say a prayer, send good vibes, commune with your culture (optional but recommended).
- Place the container in a warm, ventilated area out of direct sunlight for 7- 21 days (depends on taste). 75-85°F (24-29°C) is the best range, 80°F (27°C) is ideal (more information about maintaining proper temperature for your brew here). It may or may not get fizzy. The SCOBY may rise to the top or sink to the bottom, doesn’t matter, the new culture will always form at the top (more information about the 5 Signs of a Healthy Brew here).
- After 7 days, or when you are ready to taste your KT, gently insert a straw beneath the SCOBY and take a sip. If too tart, then reduce your brewing cycle next time. If too sweet, allow to brew for a few more days. Continue to taste every day or so until you reach your optimum flavor preference. Your own Kombucha Recipe may vary.
- Set aside your SCOBY(s) and starter liquid (2 cups if possible) for the next batch from the top of the current brew. You may put them in any vessel or a SCOBY Hotel.
- Decant & flavor your kombucha (optional). Learn about Flavoring Kombucha here.
1 Minute Kombucha Recipe Video
Expand your Knowledge - read a book, take a class!
-

Kombucha Side Hustle Class
$44.00 Add to cart -

Kombucha Brewing Basics Class
$57.00 Premium content -
Sale!

Kombucha FUNdamentals Course
$248.00Original price was: $248.00.$124.00Current price is: $124.00. Add to cart -
Sale!
The Big Book of Kombucha – 400 Recipes
Rated 5.00 out of 5$16.95 – $26.95Price range: $16.95 through $26.95 Select options This product has multiple variants. The options may be chosen on the product page
Kombucha Recipe Notes & Tips
- Drink as desired! Start off with 4-8oz (100-200ml) on an empty stomach in the morning, then with meals to help with digestion or as your body tells you it would like some more! Drink plenty of water as it is a natural detoxifier and you want to flush the newly released toxins out.
- Kombucha in the bottle never “goes bad” as long as no mold is present. However, it may eventually be too sour to enjoy. Refrigeration slows this process.
- To dechlorinate tap water, allow to sit out overnight uncovered or boil for 10 minutes, then cool to needed temp.
- Small variations in tea or sugar used are not a concern. Increase or decrease the amounts to find the Kombucha recipe you prefer, but never use less than ¾ cup (150g) sugar or 3 bags/tsp of tea per gallon.
- Airflow is key, therefore find an open area for your Kombucha Tea. A typical empty cupboard or pantry is fine but one jammed with other food items or without any airspace may not work as well.
- Always use cotton cloth covers to allow oxygen to reach the brew. Only cloth with a tight weave should be used. Clean used t-shirts or sheets are a great option. Avoid cheesecloth as the holes are too large and will allow fruit flies and contaminants.
- Soap is not needed when rinsing the brewing vessel between batches, unless there was mold or some other brewing issue. If the brew was successful, all that is needed is a clean water rinse.
- Should mold or other brewing issues occur, clean with hot water and soap, then rinse very well with clean water. If the jar has a spigot, remove it and soak in soapy water or bleach to kill any spores, then rinse clean. All items can be cured in distilled (pasteurized) white vinegar. Never use raw vinegar with Kombucha to avoid spoiling the brew.
- To make larger batches, scale the amount of SCOBY and starter liquid with the other ingredients. For a larger Kombucha recipe, one large SCOBY and 1-2 cups starter liquid is recommended per gallon of sweet tea. Batches over 5 gallons in size can experience issues of uneven fermentation.
- Kombucha is a LIVING organism, so many believe the energy in the room will directly influence your culture.
- More Kombucha Brewing Safety Tips here.
Kombucha Recipe Troubleshooting
- The original SCOBY may sink or float in the batch, and may be upside down or all the way down at the bottom of the jar, it makes no difference. It is only the new SCOBY that grows on top of the brew.
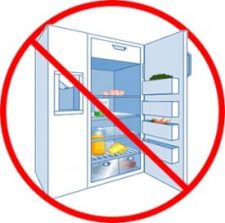
No SCOBYs in the Fridge!
- Not sure if your Kombucha batch is brewing right? It should lighten in color, develop a “Kombucha smell”, and show SCOBY and yeast growth. Learn more about the 5 Signs of a Healthy Kombucha Brew here.
- Yeast can form under the SCOBY or on the sides and look scary, but mold is dry and fuzzy and on top of the brew. For lots of mold vs not mold information and pics click here.
- If you see mold then throw everything away. All the Kombucha SCOBYs and the liquid in the jar could have mold spores even if mold is not visible. Kombucha Cultures are not salvageable when mold strikes.
- Having slow SCOBY growth or mold issues? Temperature is the most common cause, find out about heating all your ferments here.
- Dispose of a SCOBY if it creates mold, gets soft or gelatinous around the edges, takes on dry, strange layers or unusual color.
- Start a SCOBY Hotel to store extra SCOBYs and be sure to refresh the Hotel every couple of months for best results, more SCOBY Hotel Maintenance Instructions here.
- Never store Kombucha SCOBYs in the Refrigerator! Learn more about refrigerated SCOBYs here.
 Get A Kombucha Culture Today & Start Brewing
Kombucha Recipe FAQ
- What kind of brewing vessel can I use? Plastic? Metal? Glass?
Glass, Porcelain/Ceramic/Stoneware, Stainless Steel, and Wood are the most common brewing vessel materials. Plastic may be acceptable but is not recommended. Find out how to select a brewing vessel with or without a spigot here. - Can I brew 1 gallon of Kombucha in a larger vessel such as 2.5 gallons in size?
Yes, there is no problem with the vessel being less than full. - What type of tea can I use in my own Kombucha recipe? Decaf Tea? Flavored Tea?
Kombucha requires real tea, Camellia sinensis, so that it can thrive over time. That means unflavored black, green, or white teas. Decaf or Flavored teas (which are often actually tisanes) should be used in experimental batches. More about types of tea to use here, and exotic types of teas/flavored teas here. - Should I rinse my SCOBYs to remove yeast between batches?
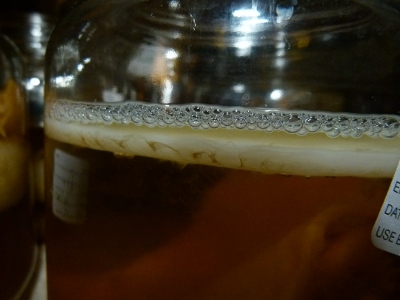
No, we do not recommend rinsing SCOBYs, but you can remove the yeast by hand if there is a lot present. If you really want to rinse them off, use already fermented Kombucha from your hotel. - Can I cut SCOBYs for storage or sharing?
Yes! Cutting the SCOBY will not harm it, and brief contact with scissors or a knife is not an issue, even if not stainless steel. - I have a lot of extra SCOBYs, what can I do with them?
SCOBYS are very versatile, check out this page about other uses for SCOBYs. - Does Kombucha have caffeine?
Kombucha has about ⅓ the caffeine of a cup of tea, on average. But it’s also possible to reduce that amount to even less. Learn more about Kombucha and Caffeine here. - Is there sugar remaining in this Kombucha recipe?
While some of the sugar is consumed during the process, there is residual sugar in Kombucha, otherwise we would never be able to drink the healthy acids in the brew. On average there are between 2 and 8 grams of sugar in each 8oz glass, depending on fermentation time. However, that sugar is also broken into fructose and glucose, not just sucrose. For more about Kombucha and Sugar click here. - Is there alcohol in Kombucha?
All naturally fermented food items have trace amounts of alcohol present, depending on the process. Finished Kombucha has between .2% and .8% alcohol on average, and is not intoxicating. The amount present can be limited by maintaining refrigeration of the brew after bottling and by limiting flavors added to those that are sugar free. - My Kombucha is too sour, what should I do?
Flavoring can help with sour Kombucha. Next time simply shorten the brew cycle in your Kombucha recipe, meaning taste earlier in the process and bottle when it’s still a little sweeter than you like. And don’t throw away that sour Kombucha, you can use it to start a SCOBY Hotel! - I’ve heard about Continuous Brew Kombucha, is that better?
Continuous Brew Kombucha is a way to make more brew, faster, with less effort. For anyone who loves having homebrew Kombucha available, it’s a great option. Learn more about Continuous Brew Kombucha here. - I’ve got fruit flies around my Kombucha, what can I do?
Check out the fruit fly trap video here. - I’d like to take a break from brewing Kombucha, how can I?
Simple, start a SCOBY Hotel (video). Or if you are doing Continuous Brew, you can just leave the SCOBYs and liquid alone in the vessel for many weeks and start over when you return, it will act as its own Hotel.
Kombucha Recipe VIDEO: Do I Have To Use Sugar To Make Kombucha? With Hannah Crum The Kombucha Mamma
Variations on the basic Kombucha Recipe
It’s possible to alter a Kombucha Recipe in many ways. Homemade Kombucha is the freshest and making kombucha for yourself allows for complete flexibility to try whatever kombucha recipe appeals to you. Here are a few ways to mix it up! 🙂
High Powered Kombucha Recipe
Want to have extra flavor and power to your brew? Are you the kind of Kombucha drinker that likes the strongest brew you can get? By increasing the amount of sugar and tea used in the initial sweet tea prep, this Kombucha recipe variation provides more fuel for the brew to create healthy acids. Everything else will be present too, including enzymes, tannins, antioxidants, and residual sugars, making for a mouth puckering brew. Because there is a little more sugar remaining in the brew, it should also carbonate very well in the bottle, so be careful!
Try 1.5 cups of sugar per gallon, and up the tea to 9-12 teaspoons (3-4 tablespoons). If that’s not strong enough, raise it to 2 cups sugar per gallon. For even stronger tea, use all black tea and rather than adding more simply steep longer, 30-60 minutes. When following these Kombucha recipe modifications, maintaining correct temperature is even more important as the extra sugar is vulnerable to mold. At least 80F is recommended for best results. Also brewing time will likely increase by 3-5 days on average.
Low Caffeine or Caffeine Free Kombucha Recipe
Caffeine helps drive the fermentation process and nourishes the SCOBY. But not everybody can tolerate the buzz and jitter, even the low amounts left after brewing. Most of the caffeine in Kombucha is utilized in the fermentation process by the organisms, but if your brew is keeping you buzzed at night, try one of these low caff/no caff variations.
Lower Caffeine: There are a couple of ways to lower the caffeine. First, combining one or two bags of black or green tea with rooibos will minimize the caffeine. White tea also may have less caffeine, so use it by itself for a very mellow flavor. Combine this with the steep and dump method to minimize the caffeine while still providing some for the culture.
No Caffeine: The Kombucha culture is “flexible technology” which means it can ferment a wide range of substrates (fancy word for types of tea). If completely caffeine free is the only way you can enjoy the booch, then steep 3-5 bags of your favorite herbal tisane such as chamomile (3-5 teaspoons of loose leaf) or hibiscus petals (bonus, pink SCOBY!). Some types of herbal tea may prevent the SCOBY from forming properly so use a backup from your hotel. Another option is decaf tea. If the SCOBY starts to look weak on any of these substrates, then give it a batch of sweet tea with regular caffeine to renourish. You don’t have to drink it (give it to your friends!) and it will keep your mother chugging along.
Ginger Kombucha Recipe
Ginger and Kombucha are a match made in digestive heaven. In fact, it is the top selling flavor of Kombucha at the store. Americans (all people really!) love ginger so much that before Prohibition, Ginger Beer was the most popular beverage in the United States. Rather than give it up however, it was reborn as ginger ale and for nearly a century has been prescribed by concerned moms everywhere to soothe upset tummies.
Upgrade your ginger delivery system from syrupy soda to probiotic and digestive enzyme rich Kombucha! Add zip and ‘zing’ to your booch by adding 1 tablespoon of dried or fresh chopped ginger to the tea DURING THE INITIAL STEEP. You can even toss in a few slices of ginger into the primary fermentation for enhanced power. Then add ginger juice to the bottle for a mouthwatering punch. The flavor will have you buzzing!
Kombucha Recipe ~ Bad Advice Heads Up!
- There are a lot of well meaning people out there, your average Aunt Alice or Blogger Betty or even “Cheap SCOBY Seller Chet”, and they all have “THE ANSWERS” about the best Kombucha recipe. But they’re not experts, and a lot of bad advice is simply recycled. The below are real quotes from leading sites on the internet, and they are dead wrong. Watch out for these traps and avoid sites that promote these ideas!
- “Cheesecloth is fine for any brew.” False. Cheesecloth is NO GOOD for brewing, the weave is too loose. Even if you fold it over, mold and dust will catch in the open holes and when the cloth is removed, will fall in. Use a tight weave cotton cover.
- “No matter how big the batch, you can use 1 SCOBY. It will just take longer.” False. Using not enough SCOBY for the amount of sweet tea will lead to mold. Just as important is the starter liquid, which must also be scaled up. For each gallon of sweet tea, use 1 large SCOBY (5-6 inches across, ½ – 1 inch thick) and 1-2 cups strong starter liquid.
- “Vinegar is just as good as starter liquid.” No way. Starter liquid is like liquid SCOBY that helps to distribute the organisms around the brew right away. This leads to a faster, safer brew. Vinegar does not do this at all, it only drops the pH which may help prevent mold.
- “Dehydrated SCOBYs make good Kombucha.” Wrong. Any seller that asks you to rehydrate a SCOBY for 2 weeks is wasting your time and money. Dehydrated SCOBYs do not reproduce and often lead to mold. Always start with fresh SCOBYs only.
- “You should throw away any SCOBY that turns brown.” False. It is natural for the SCOBYs to darken over time due to the yeast and the tannins in the tea. If a SCOBY starts to fall apart or turns very dark brown or black, it likely is ready for retirement. But light brown color is normal and does not indicate a dead SCOBY.
- “Always toss the (old/new) SCOBY.” False. This one gets said both ways. Both are untrue. You can keep both cultures, one is not better than the other.
- “Metal Kills the SCOBY.” Not true, but the wrong kind of metal can be an issue. Brief contact with metal has no effect on the SCOBYs. Leaving them in long term contact with metal that is not stainless steel can be a problem, but not because it kills the SCOBY. Instead the culture and brew will leach impurities from the metal. However, Stainless Steel 304 grade and higher are not a problem.
- “Store SCOBYs in the fridge.” FALSE! Perhaps the most commonly spread misconception is this old wives tale. The refrigerator does not preserve the SCOBYs, it puts them to sleep and makes brewing more difficult. Store at room temp and refresh the SCOBY Hotel every couple of months and all is well!
- “Your SCOBY has to be the same size as the jar you are brewing in or else it won’t work/won’t create carbonation.” Nope. Any shape SCOBY can be used as the new layer will then grow across the top to create the seal.
- “Retain the SCOBY and enough liquid from the bottom of the jar to use as starter tea for the next batch.” False. Always use starter liquid from the TOP of the previous brew for best results, otherwise there will be too much yeast.




 Say a prayer, send good vibes, commune with your culture (optional but recommended).


